The RenderAI guide

Pick the right mode before you spend a credit.

Tell us what you have, and see what every mode and option does — with real inputs and outputs. One credit makes one render, and failed renders are refunded.

1What do you have?

2Explore a mode

Interior

Render

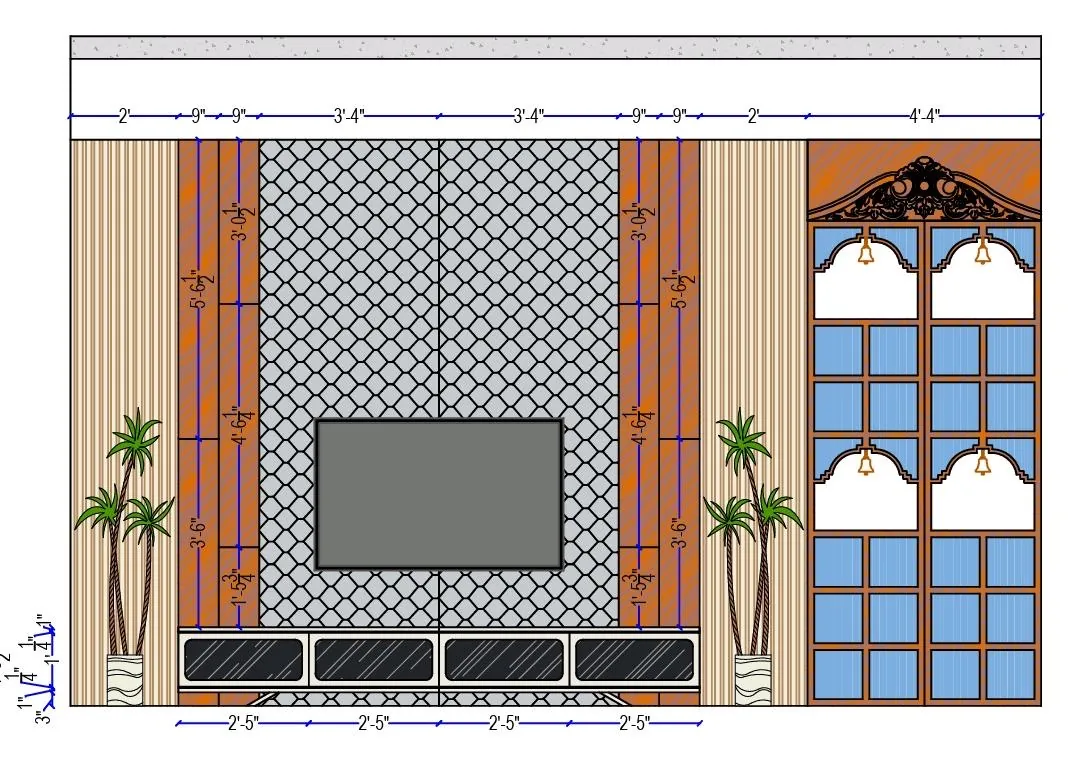
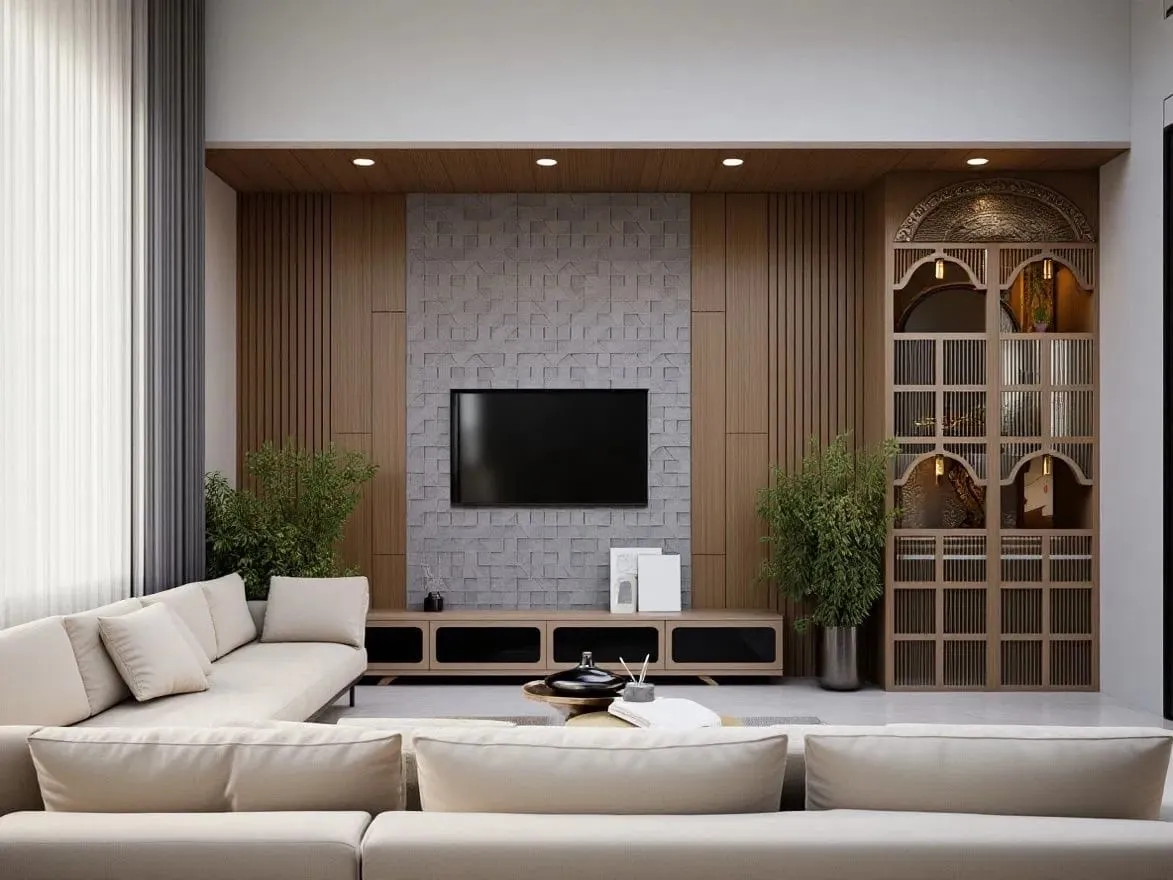
Turns an interior drawing or 3D view into a photo of that exact room — same layout, counts and camera.

Render produced from Render example
Original Render example
InputOutput
You give

A SketchUp view, CAD elevation or white model of one wall or room.

You get

A photoreal 2K photograph of that design, furnished and lit.

Options — click to see what each does

Model Type

Your view already has materials and colours — they are kept exactly and made photoreal.

Lighting

Bright, even daylight with soft shadows. The safest choice for presenting a design clearly.

Floor Finish

A soft, non-reflective floor — tiles or wood with at most a faint sheen.

Material
Texture GuidelinesName surfaces and finishes — they are applied where they most clearly belong.Walnut panelling, white Statuario marble, brushed brass handles, sage green sofa
Human

An empty, styled room — the design is the only subject.

Styling

Only what is in your drawing — nothing extra is added.

  • Client presentations
  • TV units, wardrobes, kitchens
  • Checking a design before execution

Very blurry phone photos of screens — export or screenshot the view instead.
Try render on the canvas1 credit per render · refunded if it fails

After the first render: refine instead of restarting

Describe a change

Select any image and type or speak the change — English, Hindi or Gujarati. Only that change is made.

“Make the sofa grey and add warm cove lighting”

Edit an area

Brush over one part (a wall, a sofa, the ceiling) and describe what it should become. Add up to three reference photos.

Brush the console → “walnut console with brass legs”

Variations

Ask for 1–4 versions at once and pick the best. Each variation is a separate render (1 credit each).

3 variations of the same TV wall

Download & 4K

Download the original from the canvas, or open a render to upscale it to 4K for print.

Brochure-ready 4K export

Free tools — no credits, nothing uploaded

Recolour a surface Free

Click a wall, sofa or cabinet — it is selected for you — and try colours instantly. Texture and shadows stay. Save it as a new image.

Try 5 wall colours with a client in a minute

Walk into it (3D) Free

Turn any render into a 3D photo you can look around, and save a short clip for Instagram or WhatsApp.

A moving preview from one still render

Before / after reel Free

A 9:16 video that sweeps from your drawing to the render. Shares straight to your phone’s apps.

Post your drawing → render reveal

Click to select Free

In Edit area, click an object instead of brushing it. Shift-click to remove a part.

One click selects the whole sofa

Photo check Free

Before you render, we flag images that are too small, blurry or dark, and suggest the right mode.

“Looks like a floor plan — use Floor plan → 3D”

Six tips for the best first result

  1. Export, don’t photograph the screenUse SketchUp’s Export 2D Graphic or a clean screenshot. Photos of monitors add glare and blur.
  2. One wall or room per imageCrop to what you want rendered. A tight crop of a TV wall beats a whole sheet with title blocks.
  3. Keep labels short and clearLabels like “T.V.”, “Mirror” or “Wardrobe” are read and turned into real objects — and never printed in the render.
  4. Start with Soft LightIt shows the design most clearly. Try Day Light or Night once you like the result.
  5. Use the material boxNaming 3–5 materials gives you far more control than leaving it blank.
  6. Fix, don’t restartIf one detail is off, use Describe or Edit area on the render instead of rendering from scratch.

Ready? Your drawing is a minute away from a render.

Create your account